Dec 22, 22
Billink SOLO – Getting Started
We have launched a new Standalone version of Billink called ‘Billink SOLO’. Use SOLO anywhere, anytime, independent of any clinical software system. Its ideal for taking payments outside of clinic, in the out-of hours or as a back-up incase your
As well as using SOLO for standard SMS pay by link remote payments we’ve also released a new Virtual Payments Terminal feature in SOLO which allows you type a patients credit card and take payment immediately!
Getting Started
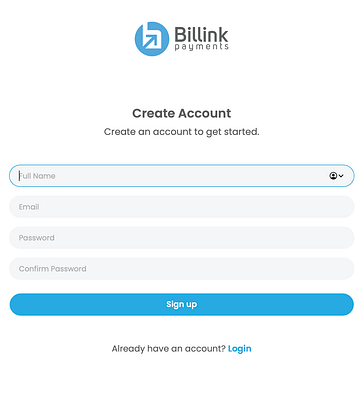
To start using SOLO create your new Billink SOLO account by clicking here: https://billink.app/register
Enter in your details on this page and click ‘sign up’. You should ideally use a different email than the one you normally use for Billink just to avoid any duplication.
Once the first screen is completed you will be shown the following screen:
Page 1: Getting Started
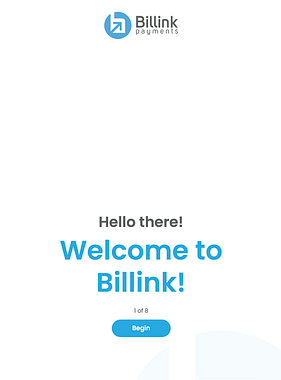
Click ‘Begin’ to start entering your details into each of the next 8 pages. This process should only take 5 mins.
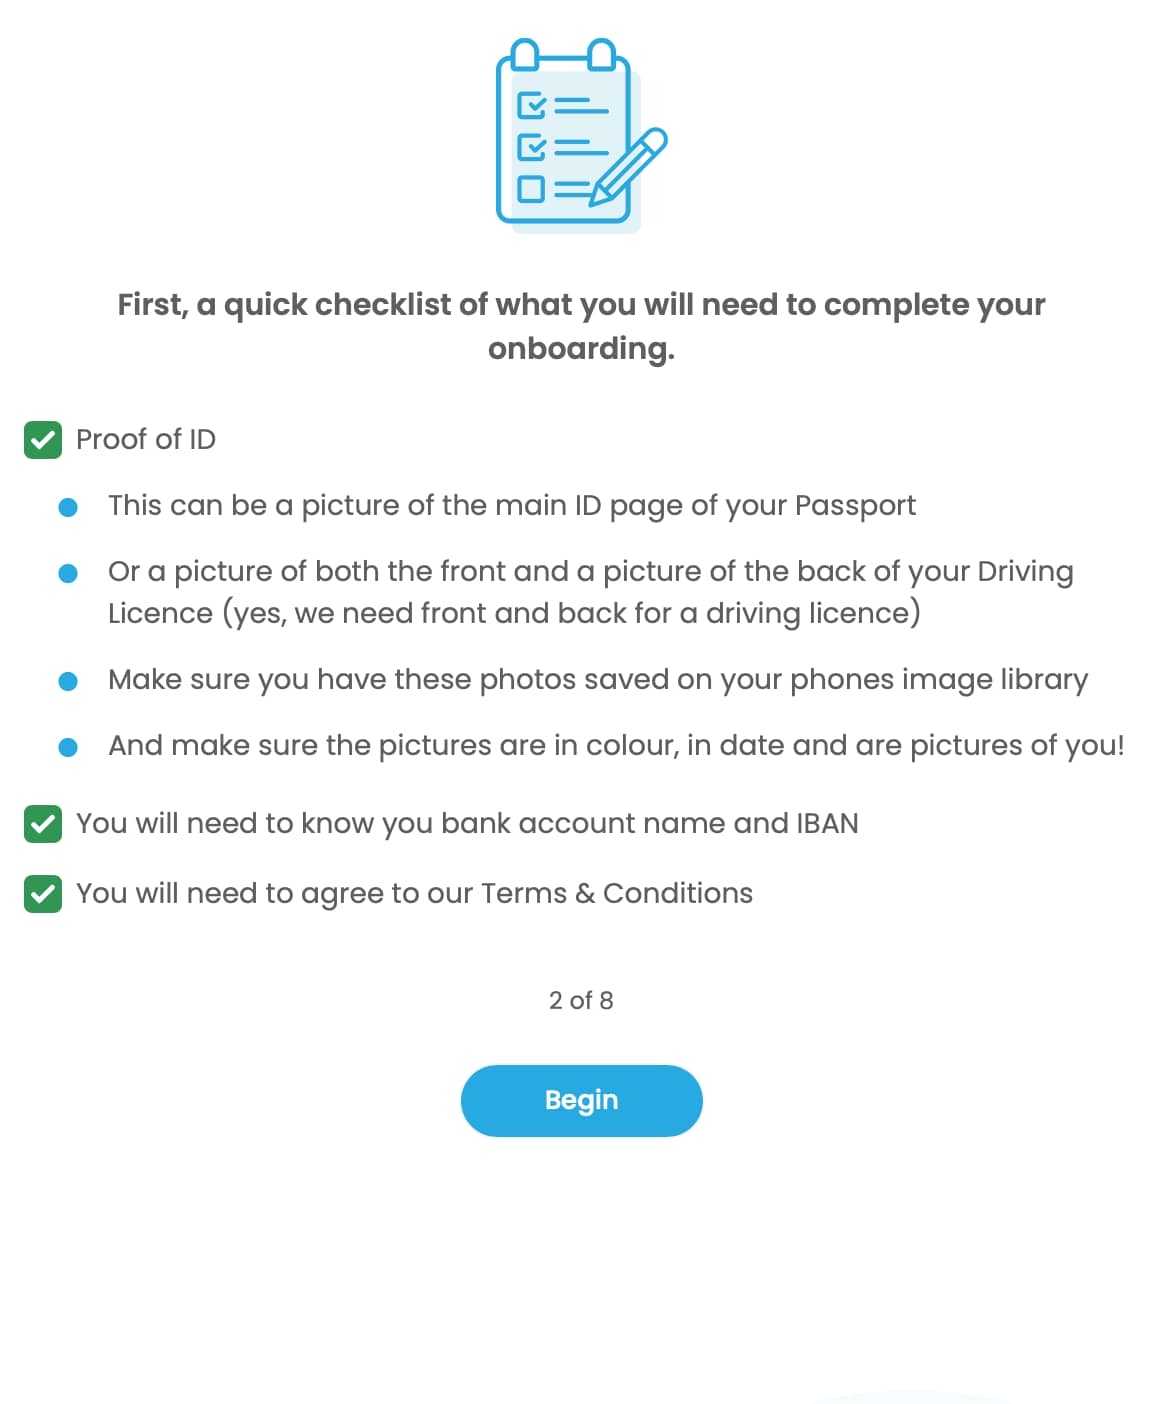
Page 2 (The Checklist)
This page shows a list of the info you’ll need to hand to complete onboard. Tick each of the boxes and then hit ‘Begin’.
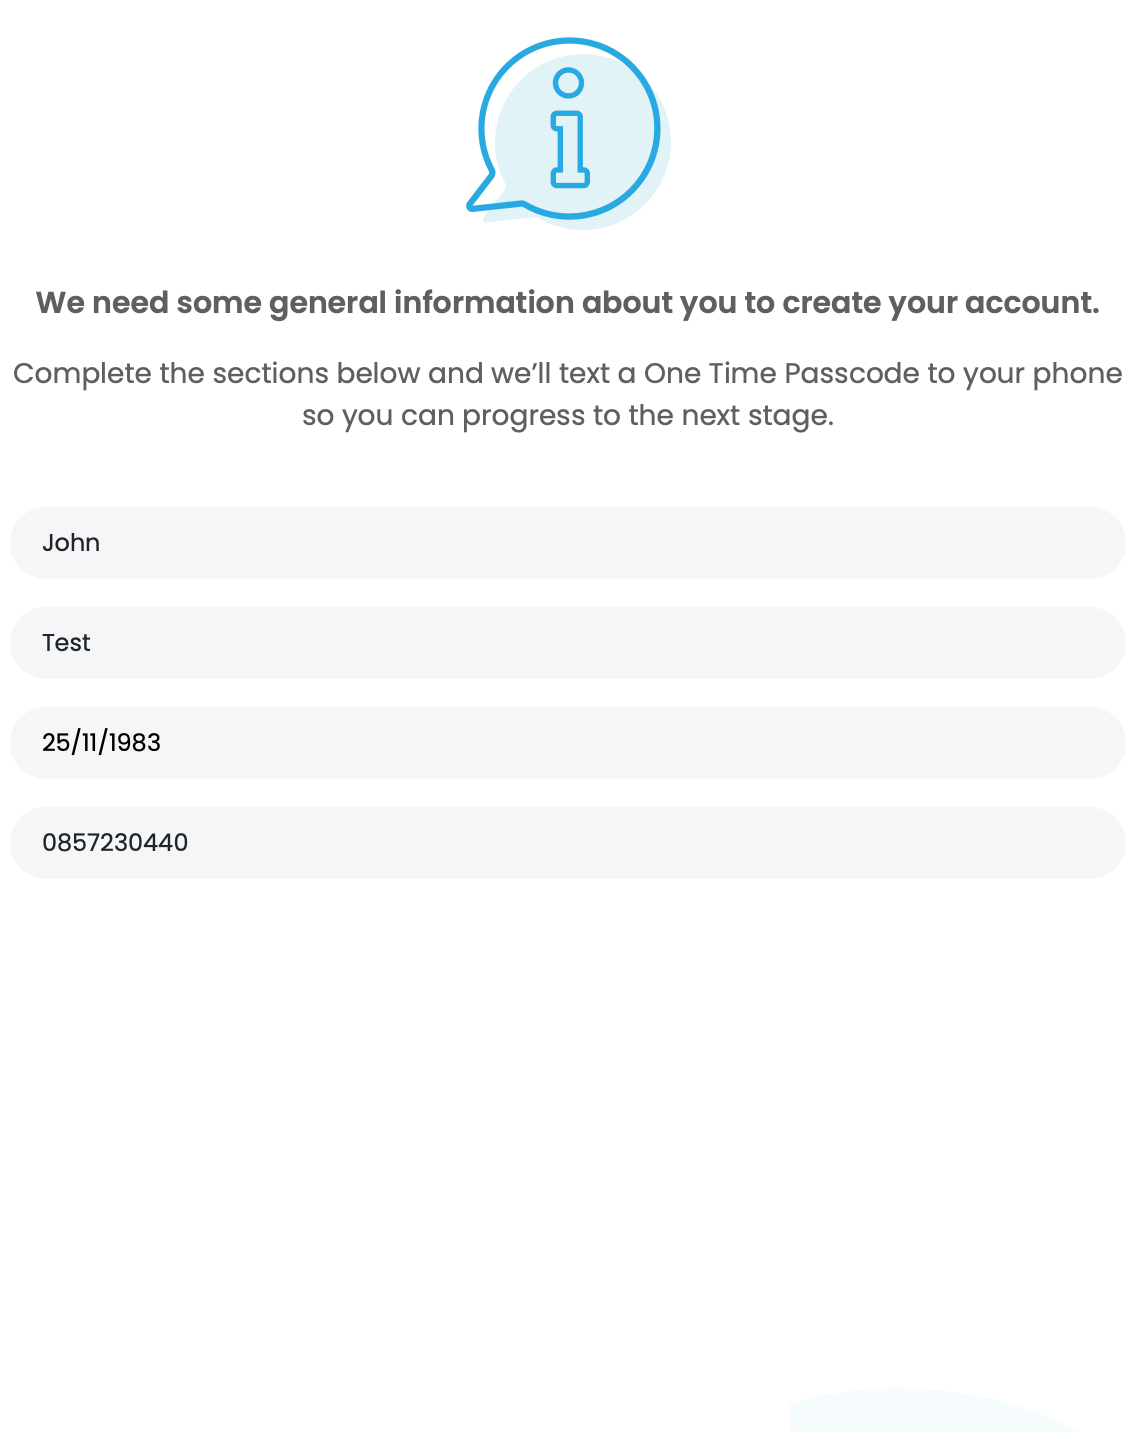
Page 3 (Personal Info)
This is information about you. It will not be shared with any of your patients/clients. We use this information to secure your account and we are obliged to know this information for regulatory reasons. Make sure to add your correct mobile number at the bottom as we will use this number to validate your account in the next step.
Page 4 (Verify Mobile Number)
We use the number provided in page 2 to send a code to your phone. Enter this code below and click ‘verify and proceed’. If you have not received a code click ‘resend new code’. If for some reason that doesn’t work you may have entered an incorrect code in the previous page so click back to double check this.
Once you have clicked verify and proceed we will take you to the next page.

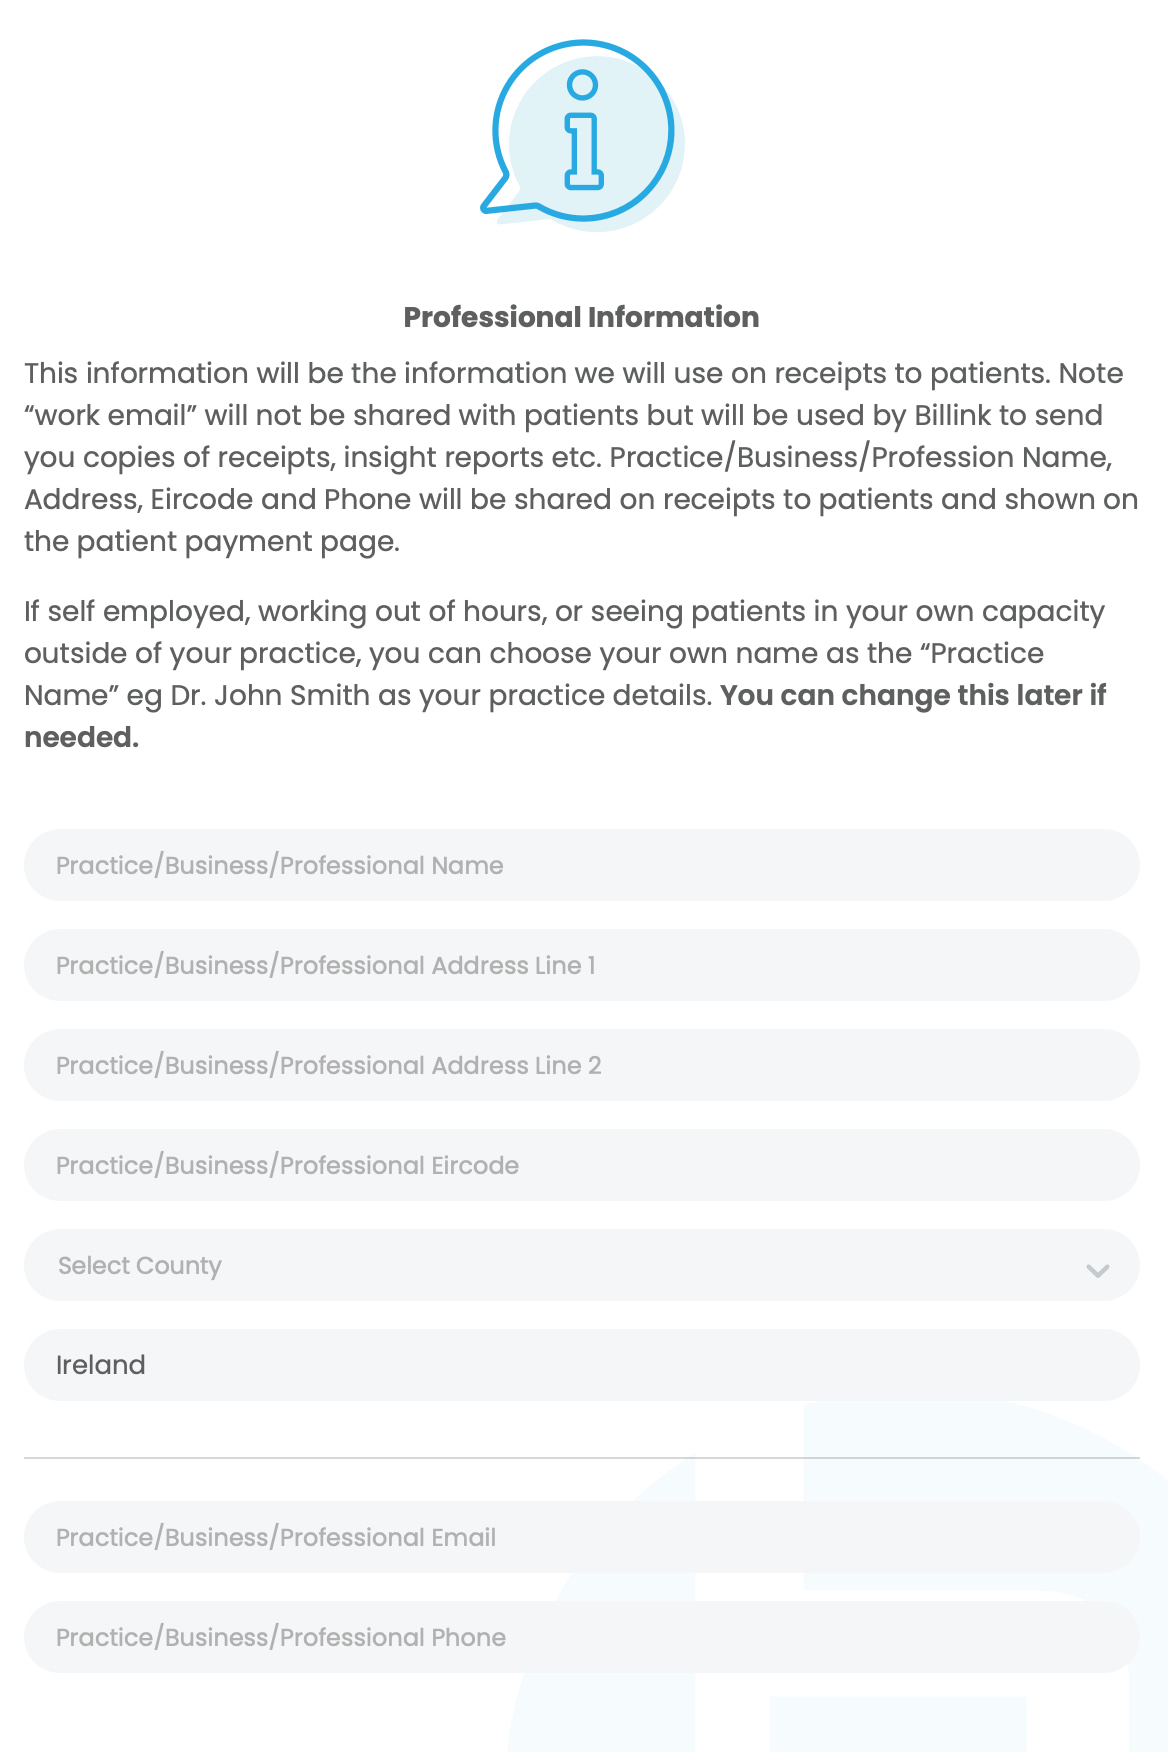
Page 5 (Professional Details)
This is the information that will be used for your account. The business name and details entered here is what patients will see when receiving receipts, making payment etc. You will have full control of these details after onboarding is complete so don’t worry they can be changed again in the future.
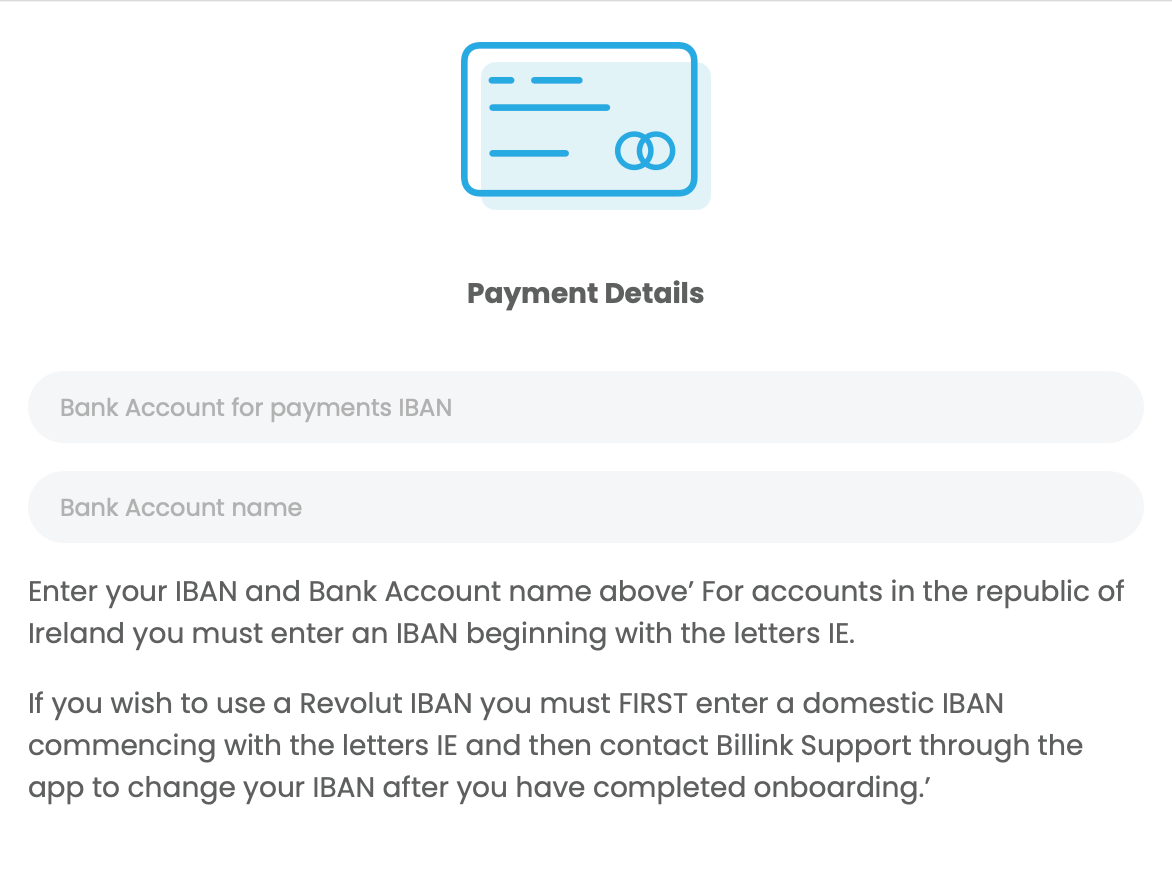
Page 6 (Payment Details)
Enter your IBAN and Bank account name here. You can use any IBAN so long as it starts with IE. (needs to be an Irish account). You can also use an IBAN already associated with Billink eg if you are using a practice account for your integrated Billink software, you can use that IBAN here too.
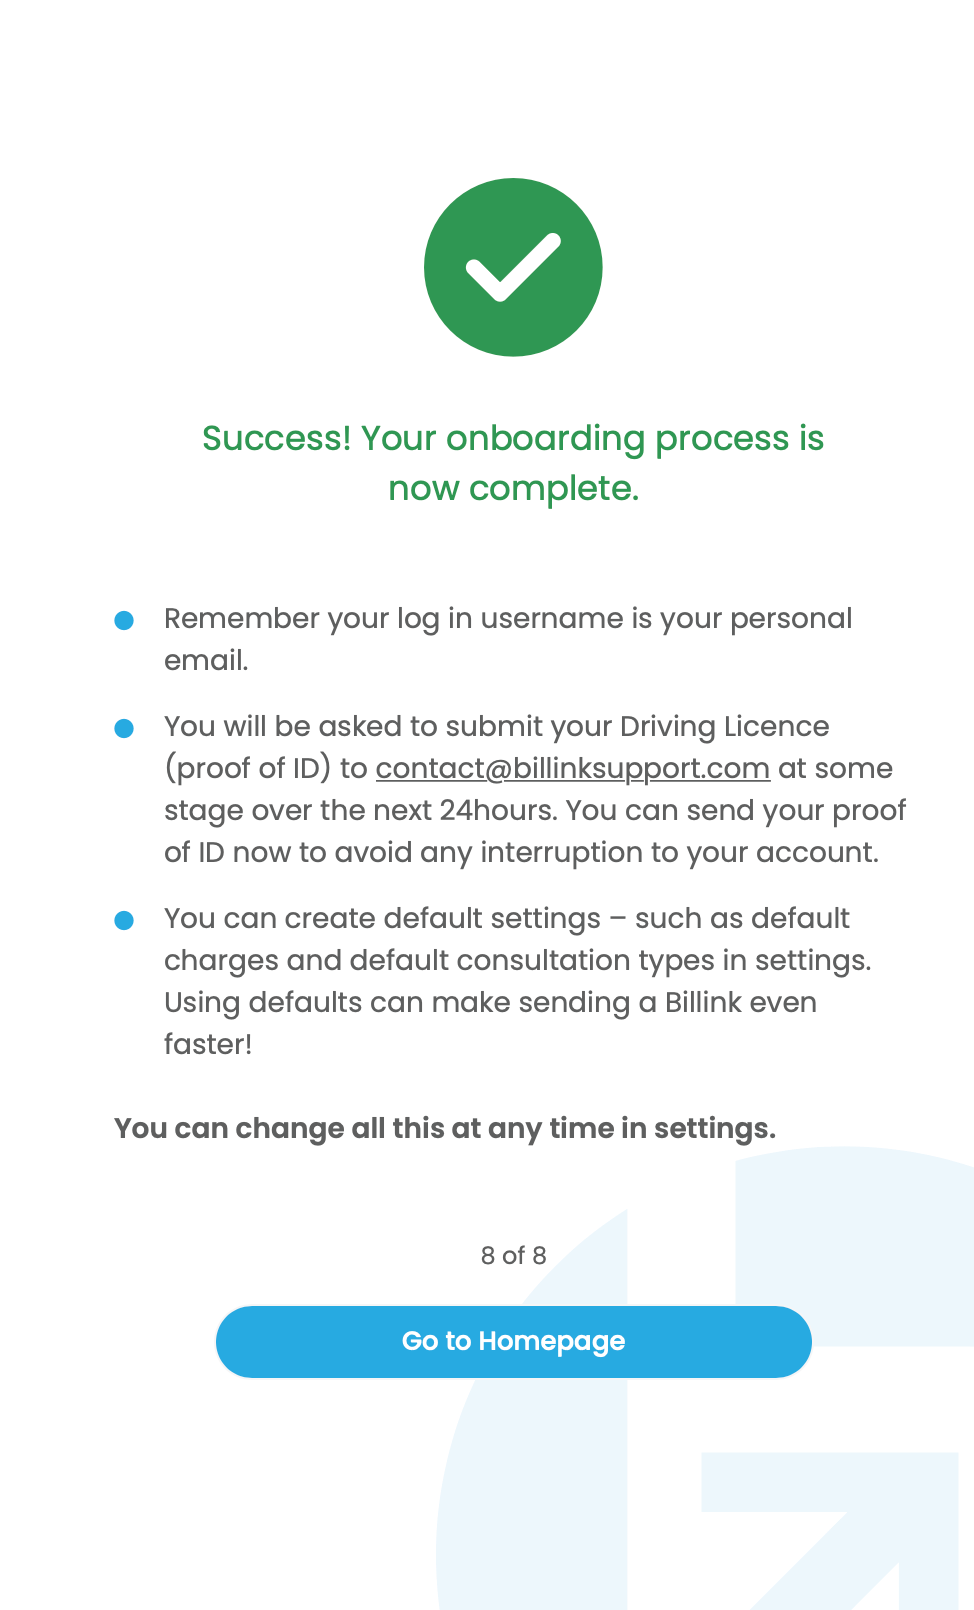
Page 7 – Successful Completion
Once all steps are completed you will be shown the following page which will include some tips and reminders. To start using Billink SOLO click on the ‘Go to Homepage’ button and you will be able to take your first card payment (using our virtual terminal) or send you first Billink SMS charge.
- SOLO – Taking Card Payments Directly
- SOLO – Taking Payments by Billink SMS
- SOLO – Admin Features
- SOLO – Transaction Management
Next (Taking Card Payments Directly)

Founder ,
Billink Payments