Mar 24, 22
Billink Terminal
Welcome to Billink Terminal
We are excited to announce that Billink Terminals are now live in GP and Consultant systems in both the UK and Republic of Ireland. With our Billink Terminals, you have two options to process payments seamlessly: the virtual terminal and the physical card reader terminal. Let’s explore the key features and benefits of each:
- Virtual Terminal: Our virtual terminal allows you to directly type in card details into your clinical system, making the payment process quick and efficient. You can now accept payments from various sources, including Billink SMS, Virtual Terminal, Physical Terminal, PIPPO, and website payments. Plus, you can track transactions for the past 90 days in both weekly and monthly views, giving you comprehensive insights into your payment activity.
- Physical Card Reader Terminal: Our physical card reader terminal provides a traditional yet enhanced payment experience. It is fully integrated with your system, ensuring seamless integration and faster payment processing. With support for EMV chip and tap transactions, mobile wallets like Apple Pay and Google Pay, and magnetic-stripe swipes, you can offer your patients a wide range of payment options. Setting up the physical terminal is easy and can be done by connecting it to your WiFi network.
Here’s a quick look at our physical card reader working in one of the GP software systems:
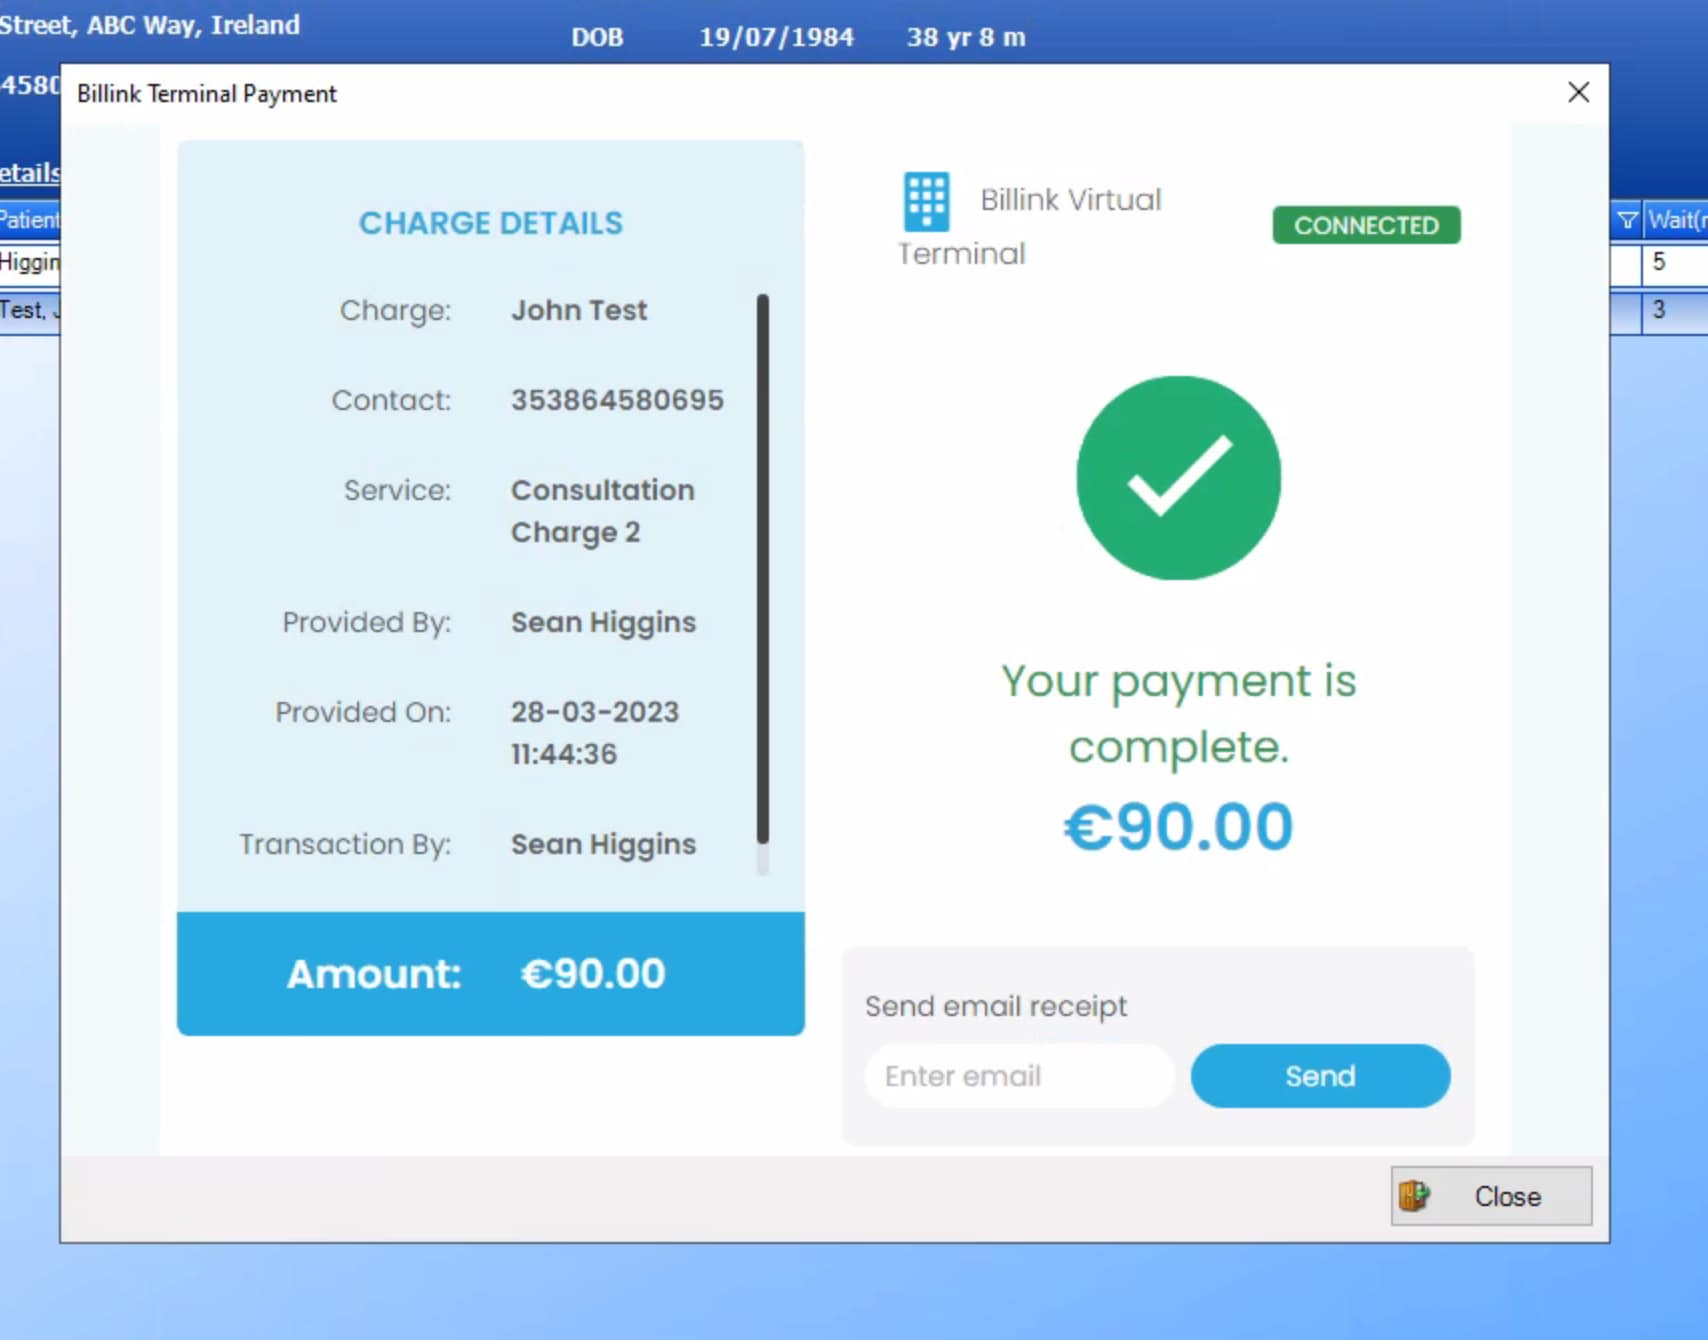
Here is our Virtual Terminal in action:
Setting up a physical Card reader:
There are two ways to connect your reader to your GP or Consultant practice system. The easiest way is to connect it to your Wifi. To do this:
- Switch on your reader
- Select the wifi you wish to connect to
- Type in your wifi password
- Once connected it will show you a three word pass phrase that you should type into your Billink Terminal Dashboard to confirm connection.
Here’s a quick video of how to connect your terminal:
Frequently Asked questions:
Q: What are the transaction costs for using Billink Terminals?
A: The same standard Billink rates apply for all transactions processed through the terminals.
Q: Are there any ongoing costs for using the terminals?
A: There are no ongoing costs for using the virtual terminals. However, there is a €1.99 weekly active terminal charge for physical terminals, which only applies if the terminal is used within the previous 7 days.
Q: How much do the terminals cost?
A: Virtual terminals are free of charge. Physical terminals are available for €199 + VAT per card terminal. As a special offer, the first 50 practices may be eligible for a full or partial discount. Reach out to us at contact@billinksupport.com to check your eligibility.
Q: What happens if I encounter any issues with my terminal?
A: Our Stripe Terminals are incredibly stable, and security and software updates are provided automatically. In case of any problems, we offer same-day replacement for physical terminals if reported before 1 pm, and next-day replacement if reported after 1 pm. In the meantime, you can continue using the virtual terminals.
Q: Can I use Billink Terminals to completely replace my existing terminal provider?
A: Absolutely! Our terminals are designed to provide a comprehensive payment solution, allowing you to consolidate your payment processing and streamline your operations.
Q: What payment methods are supported on the terminals?
A: In Ireland and the UK, Billink Terminals support Visa, Mastercard, Amex, Apple Pay, Google Pay, Samsung Pay, and contactless cards.
Q: How do I order a physical terminal?
A: You can easily order a physical terminal by clicking on the “Order Terminal” tab inside your Billink dashboard or by emailing us at contact@billinksupport.com.
Q: How do I activate my virtual terminal?
A: Our partner software vendors, including iMedDoc, DGL, Socrates, H1, and HPM, will activate your virtual terminal as they roll out the service in the coming weeks. If you are already using Billink, there is no action required from your end. The option to send a charge to your terminal will automatically appear on your charge page.
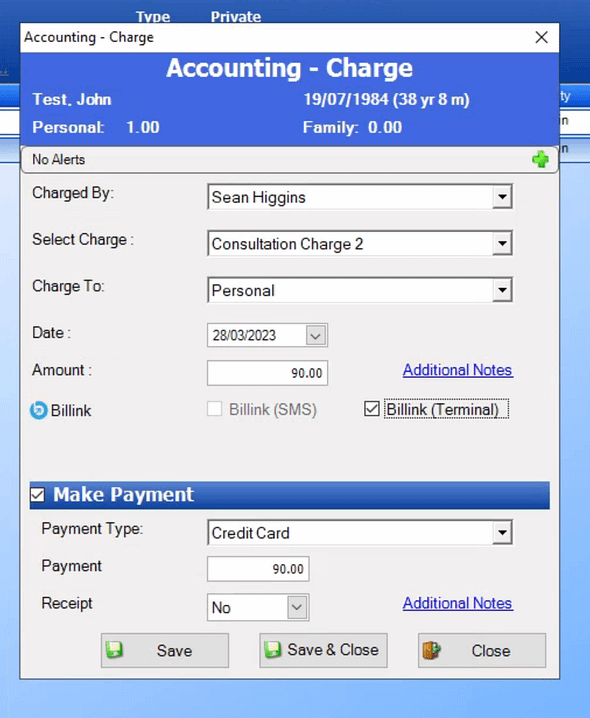
Q: How do I send a charge to a terminal once it has been set up?
A: Each system is slightly different but essentially all will provide you a ‘forked’ option to either send your charge via our Billink SMS or Billink Terminal as shown below with the EHR Socrates example. Once a charge has been created there will be an option to send via Billink (Terminal):
This will then display your list of terminals. Your virtual terminal will always be shown on top and then any physical terminals will be shown below:
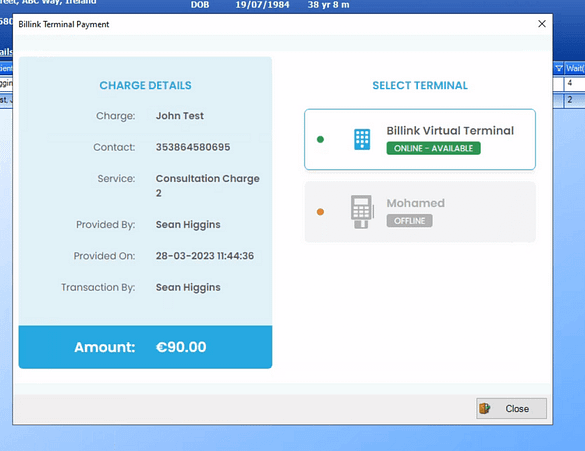
Select Your preferred Terminal and take your payment within 2-3 seconds
Overview of our Physical Card Reader – Getting Started
Getting started with our Billink Physical Terminal
The WisePOS E is a countertop reader for your JavaScript and server-driven point of sale application (as well as iOS and Android). It connects to our platform over the internet. It supports EMV chip and tap transactions, mobile wallets like Apple Pay and Google Pay, and magnetic-stripe swipes. You can upload a custom reader splash screen and show line item details on the screen during the transaction.
Payment types: Magstripe, Chip (EMV), Contactless (EMV + NFC), Apple Pay, Google Pay
Connectivity: WiFi and Ethernet
In the box:
- WisePOS E Card Reader (see two screenshots below)
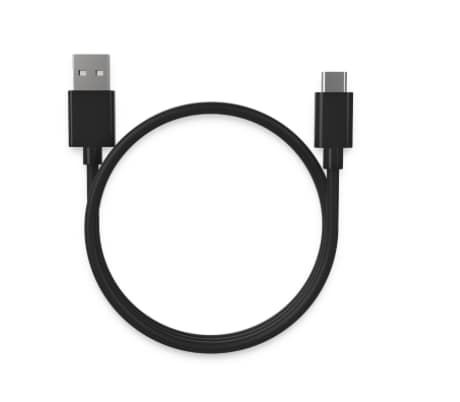
- WisePOS E Connector Cable (see screenshot below)
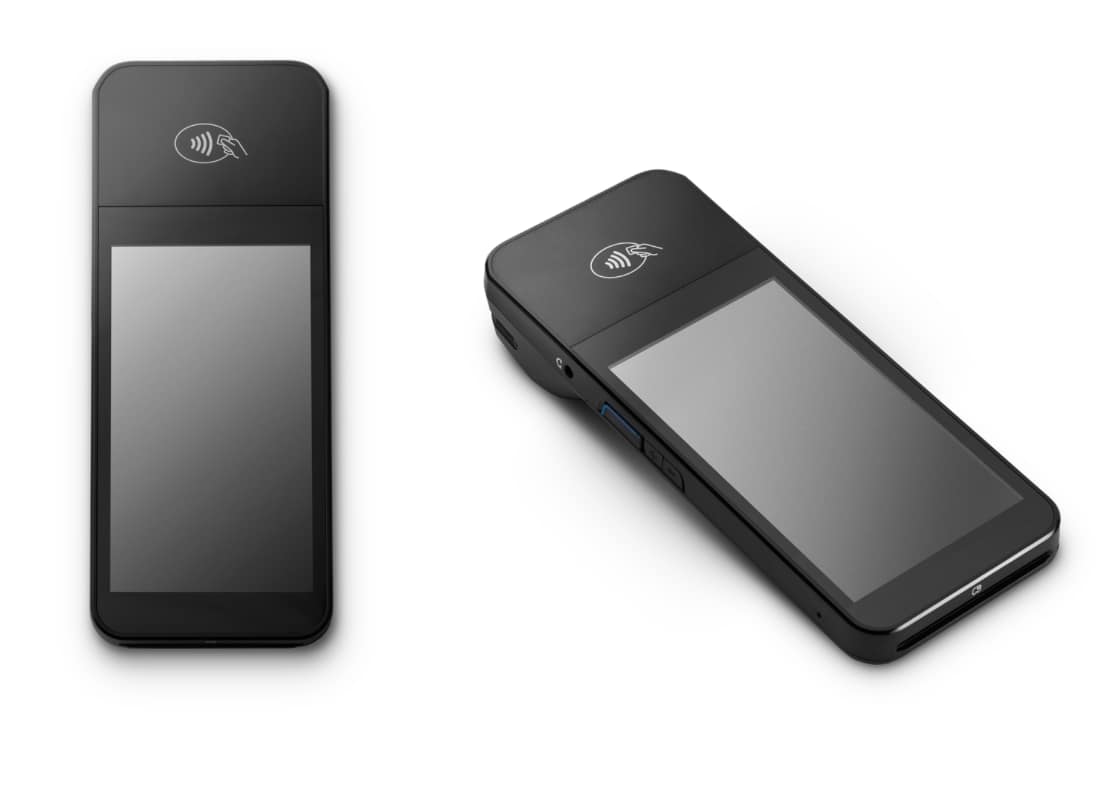
- Reader – this is what you will present to the customer to pay for the item, through swipe (magnetic strip), dip (insert the card to read the pin), or contactless tap (such as Apple Pay).
- Charging cable for the reader – the reader automatically turns on when connected to power.
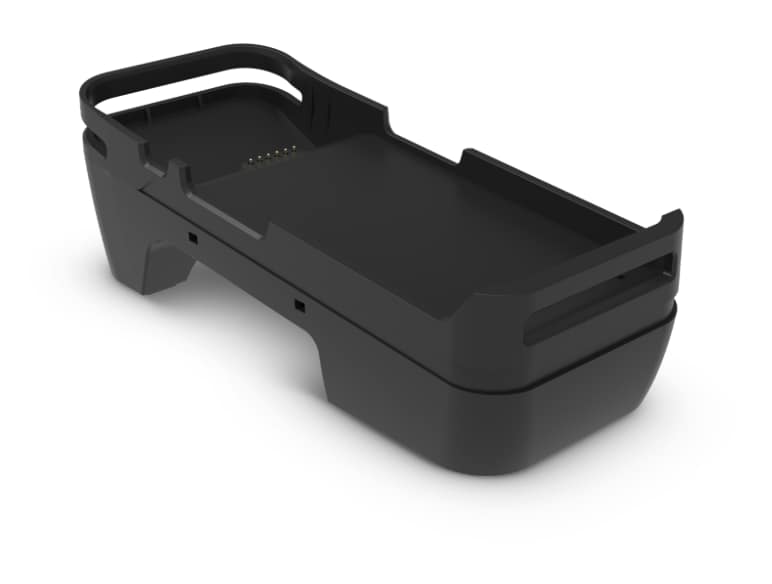
- (Optional) Ethernet dock – Connect an Ethernet cable from your router to the WisePOS E, using the ETH port
Setting up your Reader:
Follow these steps in the following sequence to set up your reader:
- Turning the reader on and off: When you first receive the device, install the battery. With the back of the device facing you, lift up from the indentation at the bottom left corner to detach the back cover. Insert the battery by sliding it into the exposed slot with the gold connectors at the top aligned. Once the battery is in place, charge the reader. Connect the reader to power by plugging the provided cable into the port with the lightning bolt symbol. Please always charge the reader using an outlet or the (optional) ethernet dock, do not use a laptop to charge the reader.
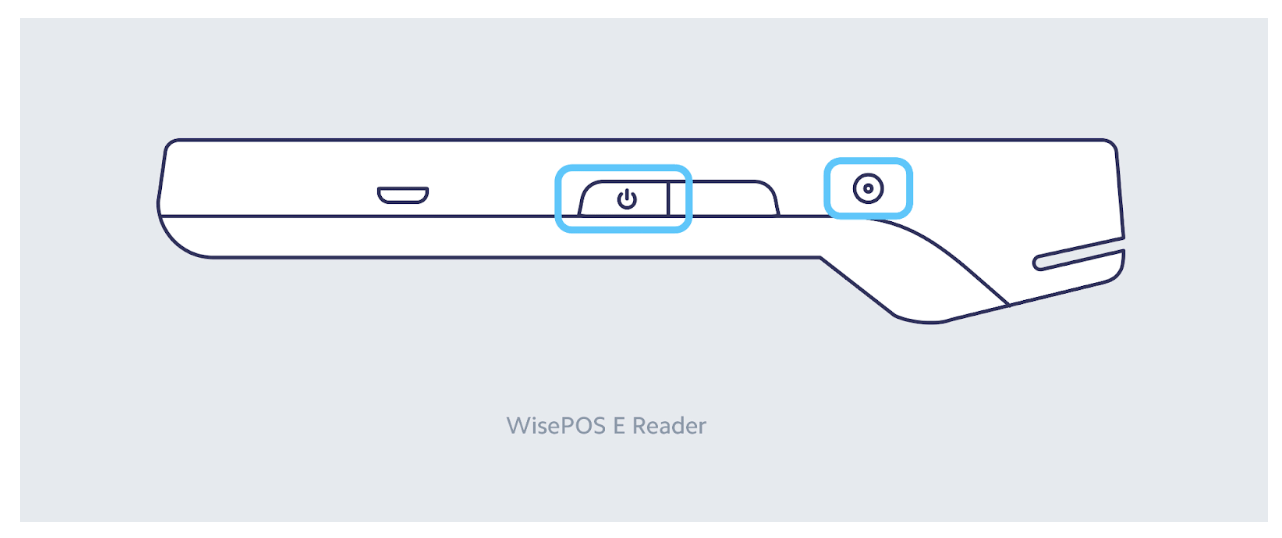
Once charged, hold down the power button on the right hand side until the screen turns on. Once the device is powered on, pressing the power button once will sleep and wake the device. To fully power off the device hold down the power button until the power off option is shown on the screen, then select it.
In a countertop deployment, leaving the device on for extended periods is expected.
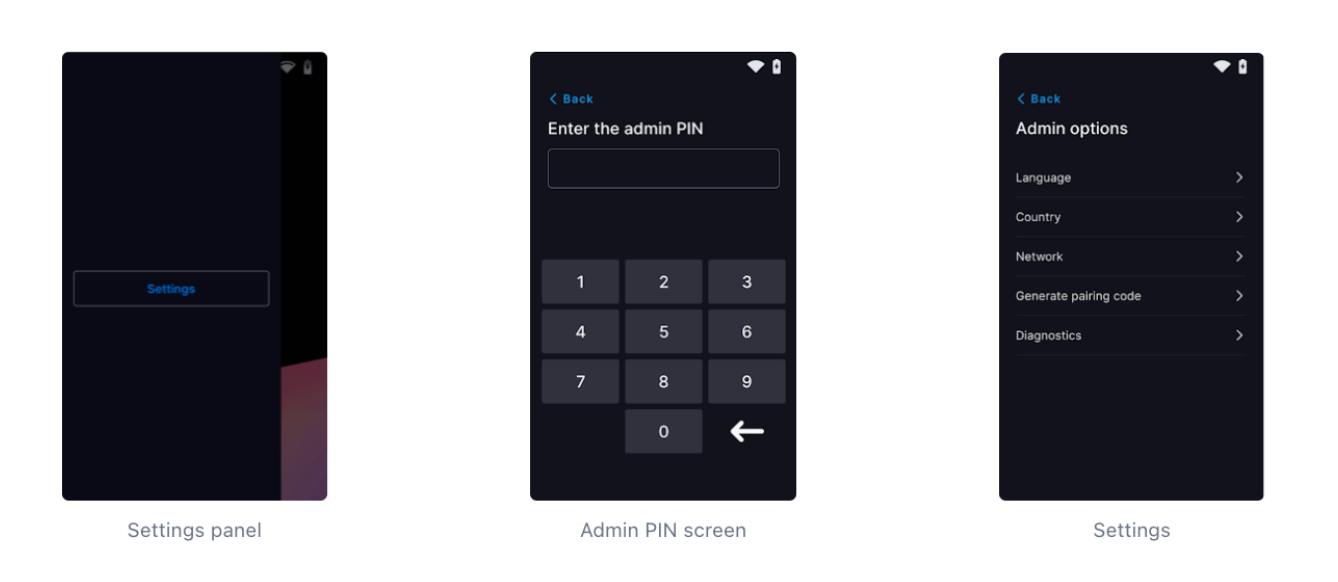
Accessing Settings: To open the settings menu swipe right from the left edge of the reader screen to reveal a settings button. Tap the settings button and enter the admin PIN 07139. From here you can update your WiFi settings or generate a pairing code for device registration. Battery percentage is displayed at the top right of this screen. To close the settings screen click the back arrow in the top left corner.
2. Connecting the reader to the internet: Because the BBPOS WisePOS E is internet enabled, its reader software communicates directly with Stripe, managing connectivity through WiFi or ethernet. To connect to Wi-Fi or switch networks, go to settings, then select Wi-Fi settings to choose the network and connect. Attempting to join a new network disconnects the reader from any existing wireless connection.
Connecting to your Reader:
Now that you’ve set up your reader and are connected to the internet, you can now connect your reader to your clinical software system, following the 3 steps below:
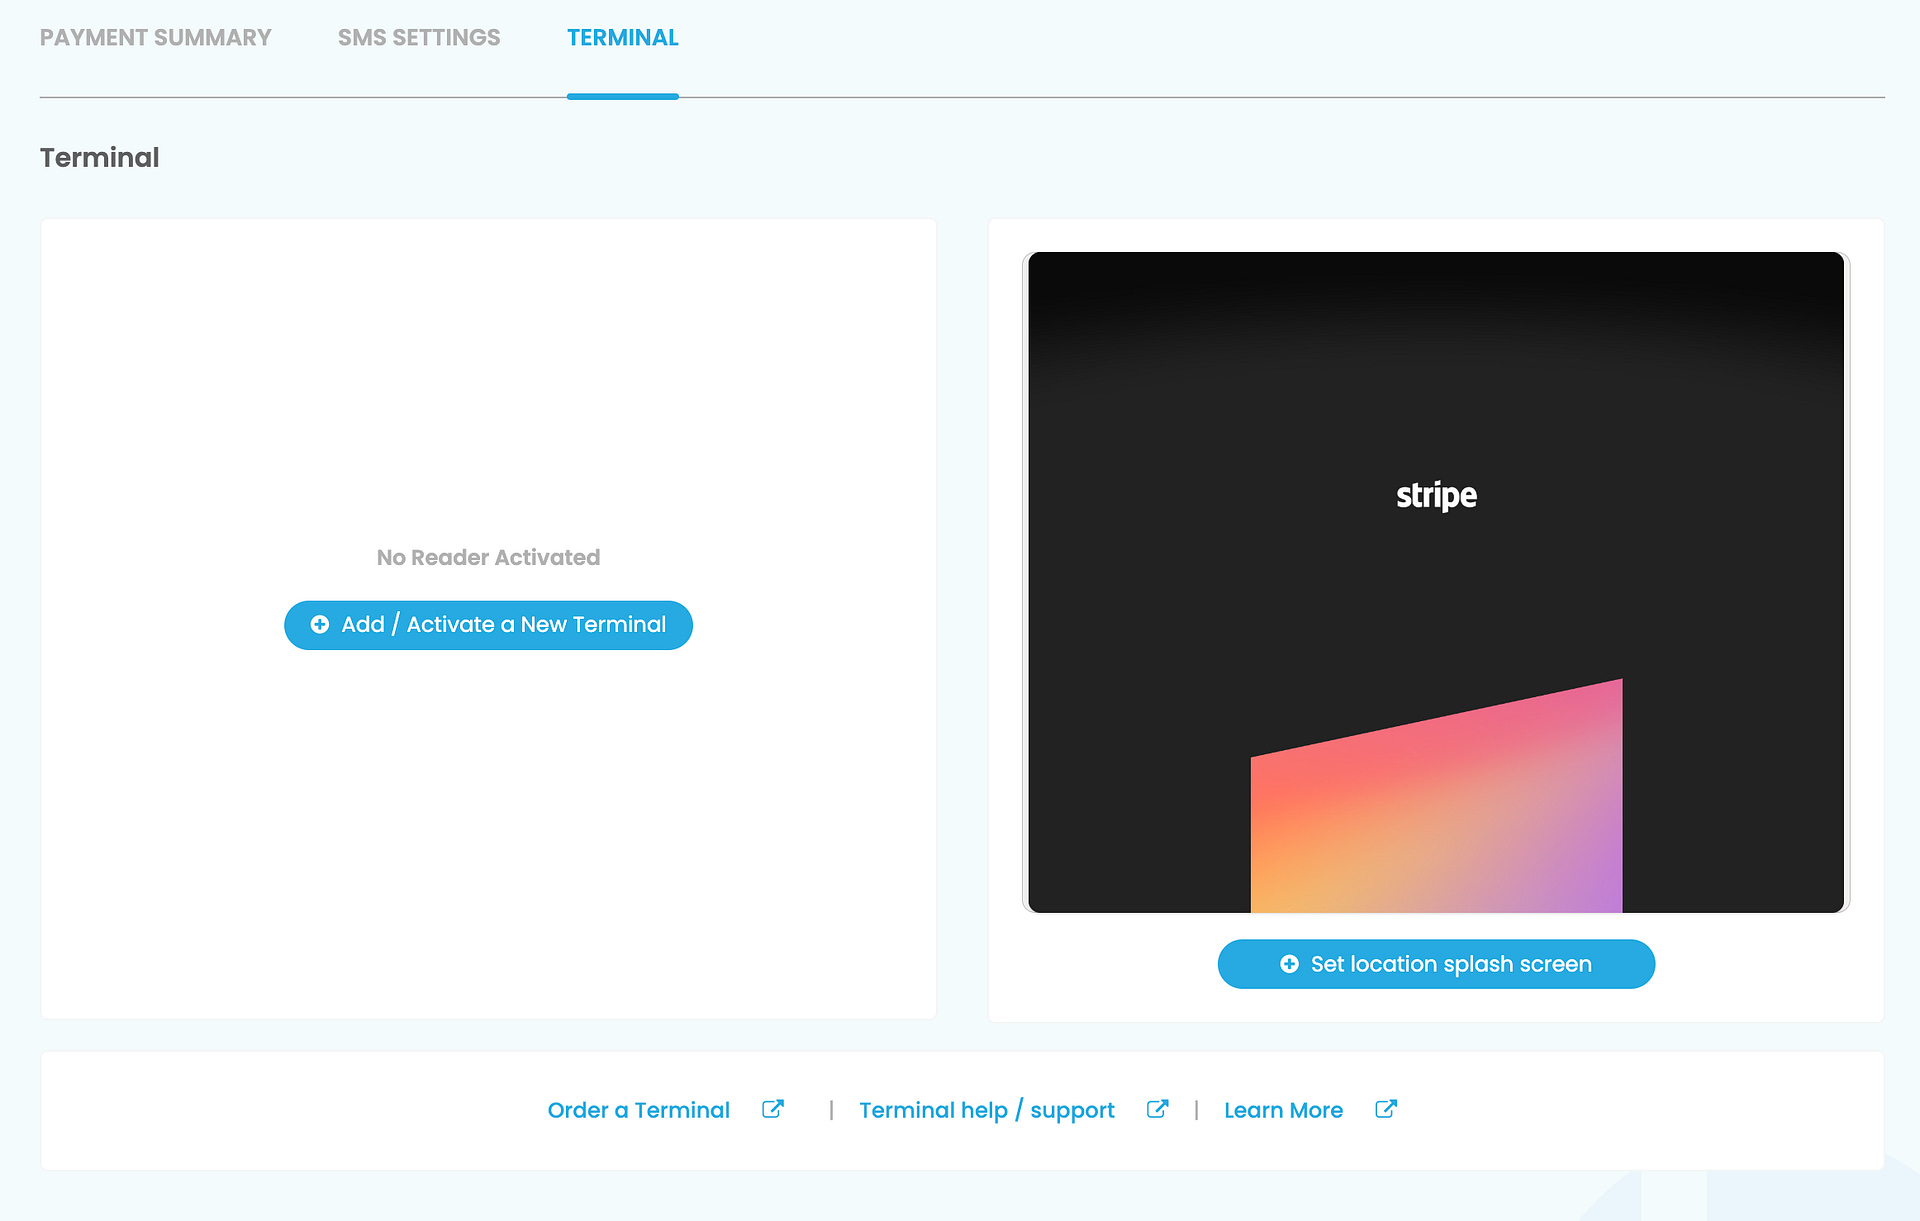
Step 1 – Click on the ‘Add/Activate a New Terminal’ inside your Terminal Dashboard
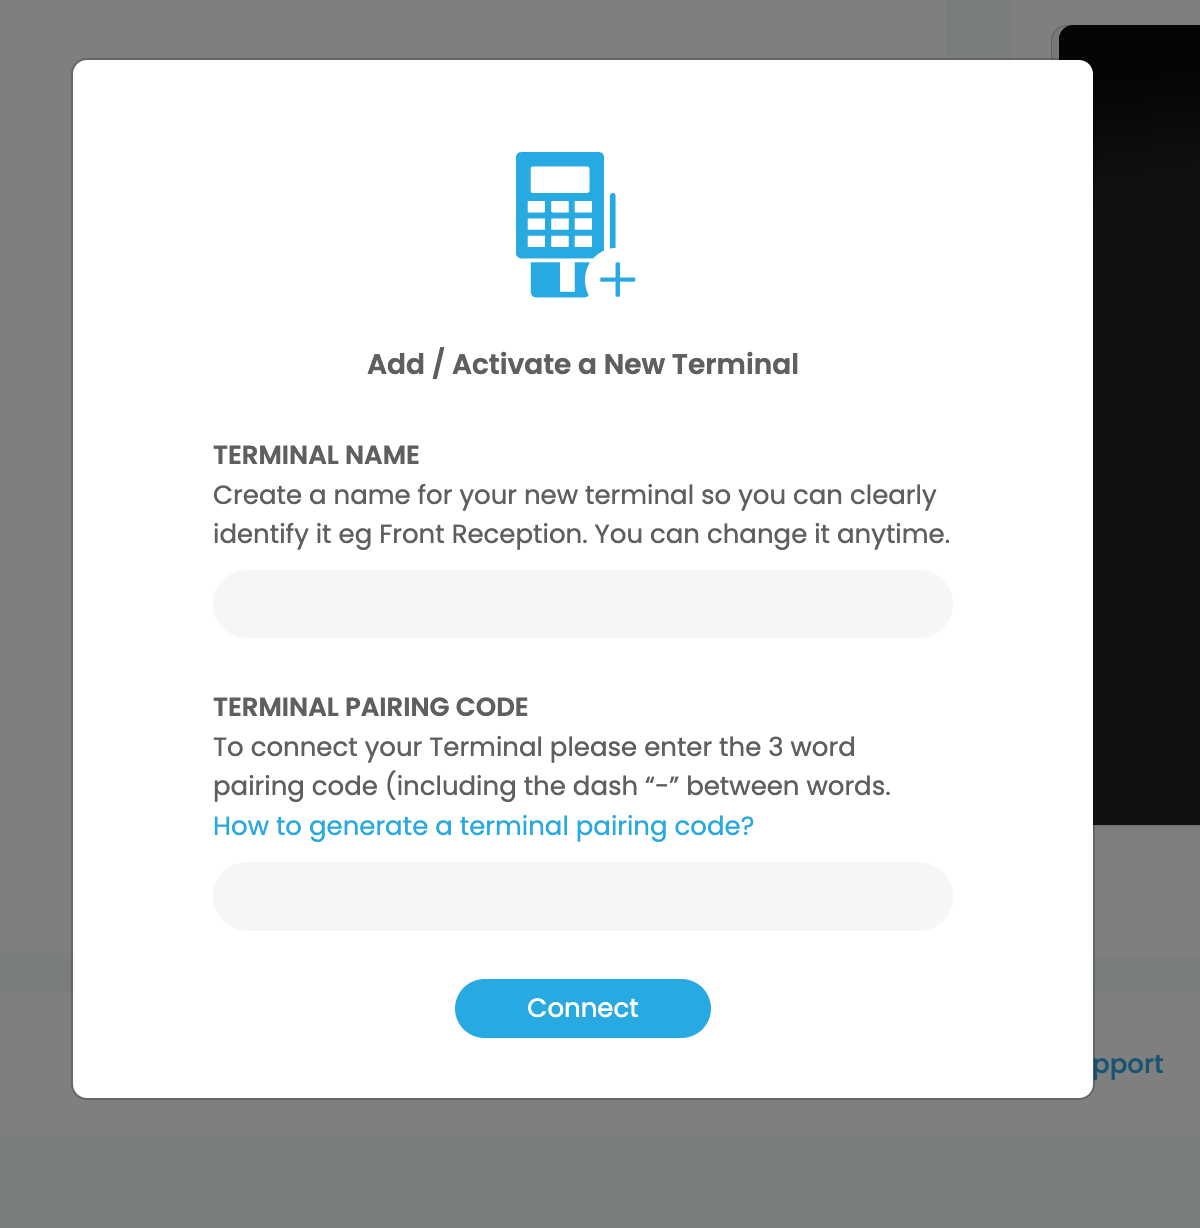
Step 2 – Give your Terminal a Name and Add the Terminal Pairing Code shown on your Terminal’s Screen
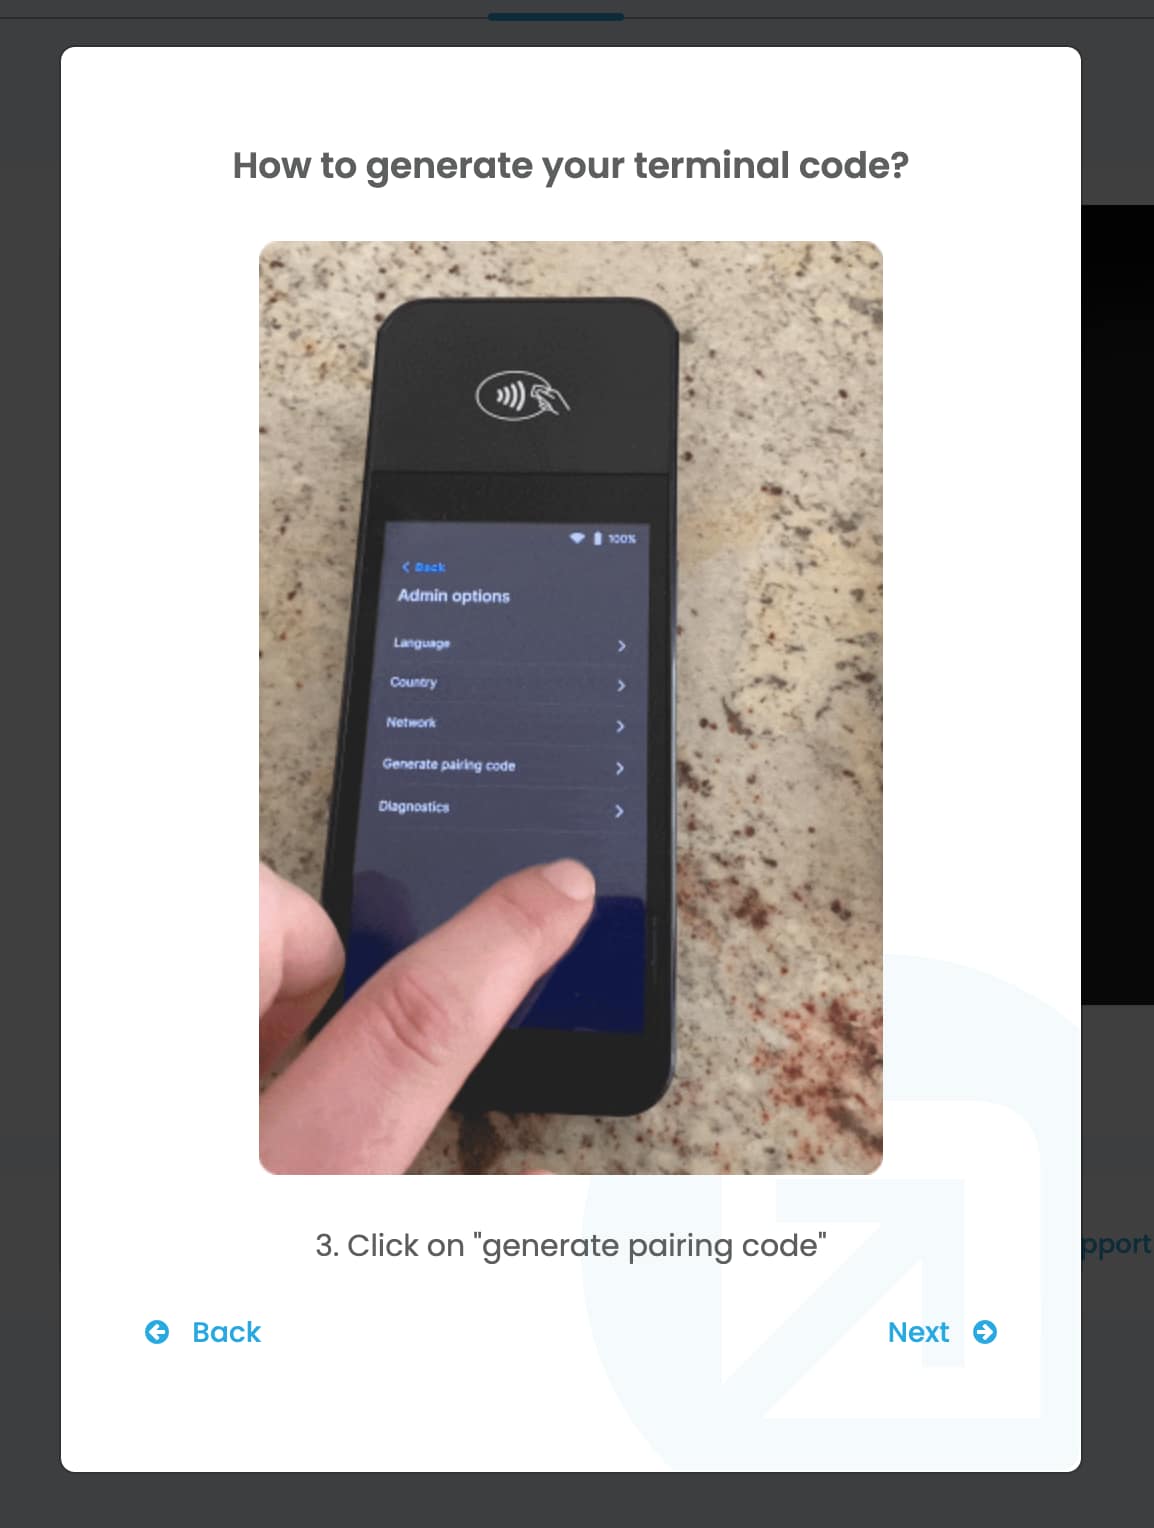
Step 3 – Generate a Fresh Terminal Pairing Code in your Terminals Settings if needed:
Troubleshooting & FAQs
To begin troubleshooting, use the following common scenarios to help diagnose the issue.
Checking connectivity
To check connectivity go to settings, then select Wi-Fi settings. This will display all available Wi-Fi networks. To see more details about the connection, tap on the connected network name.
- Make sure the network is connected and has internet access.
- The signal strength is good.
- The device has an IP address assigned.
Problems updating
If your reader doesn’t update, it’s possible that it can’t connect to Stripe. To check its connectivity to Stripe, go to settings, then select Diagnostics. This displays a list of troubleshooting tests. Check Stripe connectivity and ensure it says “Passed.” If the Stripe connectivity test fails, please follow these steps.
Router networking
If using a router, please refer to your router’s manual, and reconfigure the networking setup.
Reader has IP address, but is unable to communicate with Stripe
Here are some common reasons why this happens with corresponding troubleshooting steps.
- Stripe endpoints cannot be accessed:
- Check your computer’s firewall/denylist.
- The network source is not connected to the internet:
- In the case of bridged connections, ensure that the selected source is connected to the internet.
- In the case of router connections, refer to your router’s documentation to restart the network.
If you’re interested in finding out more or if you have any questions about Billink Terminal please send us an email at contact@billinksupport.com
Founder ,
Billink Payments